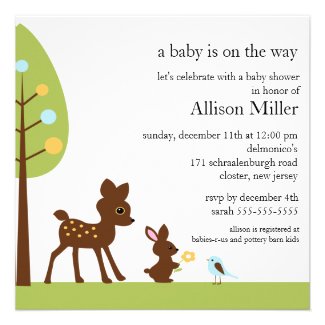
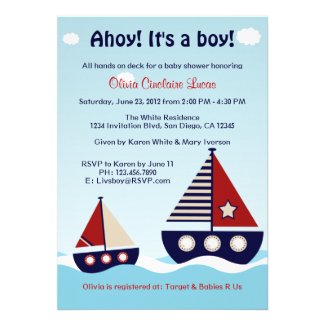
Since I'm going to be a new NANA to our baby boy #2 soon, I thought I would share some of my favorite baby shower invitations from ZAZZLE. Recently I started a shop on Zazzle and have found some wonderful art and products that I will continue to share in the future.
I'm not a big rice eater but do enjoy the taste of plain brown rice over white rice and the higher glycemic index is better for diabetics and probably most others as well.
There are lots of microwave brown rice recipes online. I found one and to make really fluffy, dry brown rice, I found modifying the recipe I chose worked really well. My 10 year old microwave may be the issue so if you've tried making brown rice in your microwave and experienced issues, try the recipe below with the modifications I've added.
THE PERFECT BROWN RICE
Wash the rice to remove the starchiness.
I use an old microwave rice cooker but any safe bowl with a tight fitting lid will do. Ratios of rice to water for brown rice are 1:4 rice to water. For example 1 cup rice | 4 cups water.
Cover and microwave until water boils (10 - 15 minutes depending on microwave).
CAREFULLY remove cover (steam does burn).
Microwave uncovered 20-30 minutes or until most of water is absorbed.
Leave rice, uncovered, in the microwave overnight (or at least 8 hours). The rest of the water will be absorbed by the rice.
Fluff with fork and serve or use in other recipes.
Let me know how this works for you and if you make modifications, please share by commenting. Have a terrific holiday season!
Back in March, I wrote about CSS3 multiple background images and using them with Blogger. There were some issues with the background rendering in some browsers when I wrote in March. Now, a mere 2 months later, it seems that with updated browser programming on most of the popular browsers, the issue is resolved. Older browser versions will show only a white background which is not a bad thing since the priority for me is that people read my blog and find something of interest.
First, one needs the individual images for the background. I use 3 -- an image for the left side, an image for the right side, and an image for the center of my blog. When I first wrote and tried using CSS3 multiple image coding, I created and used transparent pngs. The pixelation around the edges showed through and I wasn't pleased with the result.
Since then, I've been playing around with editing images to solve this problem and what I discovered is that using the center background color (or texture if that is what your Blogger background includes) as the background color on the actual images for my left and right hand borders works better than transparency. I do think the background and borders now look just how I envisioned.
This is the coding I ended up using successfully:
body {
background:
url("left-image.png") top left no-repeat,
url("right-image.png") top right no-repeat,
url("center-background-image.png") center top no-repeat;
background-attachment: fixed;
margin:0;
color:$textcolor;
font: x-small Georgia Serif;
font-size/* */:/**/small;
font-size: /**/small;
text-align: center;
}
I've copied the entire section from my Blogger html coding because this is where the changes need to be made.
With regard to my image sizing, my left image ended up being 216 pixels wide, the right image is 181 pixels wide, and the center background is 1415 pixels. I don't think the width of the background image is important as long as it is wide enough to fill the open space you have. Your images may need to be wider or narrower depending on the format of your blog. I played with sizing a bit before I found what worked for my blog. There may be a mathematical way to figure this and if you are a math whiz who resolves this, I invite you to share the information in the comments below.
W3Schools has an understandable tutorial regarding using CSS3 in this way. I also found this excellent YouTube video which explains the coding in a way even a novice can understand:
I hope this helps you. Enjoy and I would love to hear how you use this along with a link to your blog or website so I can see what you've done.
I've been sick for what seems like months with 3 different bacterial infections and viruses -- none of them the flu or whooping cough -- thank goodness! So because I've barely been able to just do the basics to take care of myself, my home is in need of cleaning -- the dust bunnies are proliferating like the real thing!!
With the economy the way it is, most of us are trying to save and living more "green" is encouraged almost everywhere. What I've found though is like buying organic food, organic cleaners cost more than the old brands we've always used.
I'm continually trying to simplify life as well as costs as I near retirement and thought I would do a Google search for homemade cleaners. I found lots and lots of websites dedicated to organic, homemade and natural.
I'd like to use one cleaner for everything if possible and out of the several possibilities I found, this one recipe is terrific. I'm using this morning in between writing and sharing this and where I've used it, my glass sparkles and the plastics and wanna be wood of stereo and televisions is now dust free.
This multipurpose cleaner is from the Newlyweds Blog. The tutorial for the cleaner is here. It is complete with photos and instructions and very simple. Here is the recipe:
Homemade All-purpose Spray
1 Empty Spray Bottle
10 drops dish soap
10 drops essential Oil (Lavender, Lemon, Orange)
1/2 cup white vinegar
Water
In an empty clean spray bottle, add 10 drops dish soap, 10 drops essential oil (optional), 1/2 cup white vinegar, and fill with water. Screw top on bottle, shake and use to clean on any surface.
I didn't have any essential oils available so I have a brief vinegar smell and then it's gone. The cost was minimal. I didn't have a spray bottle so I bought one at Dollar Tree. The vinegar and dish soap were in my kitchen. The cost without the bottle was far less than a dollar. I wouldn't recommend using a spray bottle that previously contained some other type of cleaner or chemical. Once the plastic absorbs the smell, etc., I am not sure how it might affect the homemade cleaner.
Mom, nana, designer, friend who enjoys beauty and humor. An introvert who appears to be extrovert. Love life the most at the very solitary and quiet times. Crafting and sewing have been part of my life for as long as I can remember. Please enjoy your visit. I look forward to hearing from and sharing with you!